Hosting your own analytics: A Guide with umami, Vercel and Supabase
Just revamped this blog lately with Eleventy (yes, this website!) and I’m considering adding some tracking to it. Honestly, I’m not keen on using Google Analytics and dealing with cookie banners, so I went on a search for an alternative. After a bit of digging, umami looks like a great fit for what I need.
What is umami?
From its official documentation:
Umami is a simple, fast, privacy-focused, open-source analytics solution. Umami is a better alternative to Google Analytics because it gives you total control of your data and does not violate the privacy of your users.
Umami offers all basic tracking features you can imagine: keeping tabs on page views, bounce rate, real-time data, and more. Plus, it’s GDPR & CCPA compliant, saving you from the headache of setting up a cookie banner.
When it comes to hosting, you can either go with umami’s cloud services or opt for self-hosting.
Umami’s cloud services offer a generous free tier. You can host up to three websites and handle up to 10K monthly events without a penny.
I ultimately decided to take the self-hosted route. It’s straightforward, and I can have the peace of mind of having the best privacy. Why not, right?
Self-hosting umami
Github
First off, head over to GitHub and fork umami.

Now, since we’re using Supabase for our database hosting, we’ll need to add an environment variable called DIRECT_DATABASE_URL to our schema.
Navigate to the forked repository and make the following addition inside the datasource db block:
datasource db {
  provider     = "postgresql"
  url          = env("DATABASE_URL")
  directUrl    = env("DIRECT_DATABASE_URL") ## add it here
  relationMode = "prisma"
}
Once you’ve made this change on GitHub, go ahead and commit it to the master branch.
Supabase
The next step is to head over to Supabase and either create an account or sign in if you already have one.
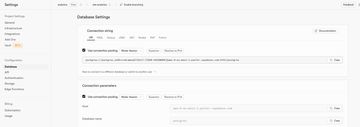
Once you’re in, if you haven’t already created an organization, then, create a new project and navigate to Project Settings.

In the Connection string section, you’ll find a dropdown named Mode: session. That’s the database URL we’re looking for.
DATABASE_URL=postgres://[db-user].[project-ref]:[db-password]@aws-0-[aws-region].pooler.supabase.com:6543/[db-name]?pgbouncer=true&connection_limit=1 # this is url from `Mode: Transaction`
DIRECT_DATABASE_URL=postgres://postgres.[my-supabase-project-id]:[db-password]@aws-0-[aws-region].pooler.supabase.com:5432/postgres # this is url from `Mode: Session`
Make sure to copy these URLs to a safe place! We’ll need them later on.
Vercel
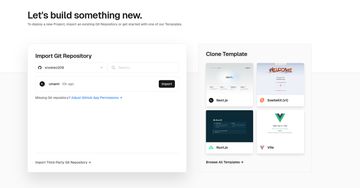
Let’s dive into Vercel! Simply sign in or create an account and link it with your GitHub. Once that’s done, you should be able to spot the repository you recently forked.

Select your forked repository and then import it into Vercel. You’ll notice a section for adding environment variables—here’s where you’ll want to pop in DATABASE_URL and DIRECT_DATABASE_URL. After that, it’s time to start building.

If all goes smoothly, you’ll see Vercel has deployed everything for you. And over in Supabase, you’ll notice a bunch of new tables added to your project.

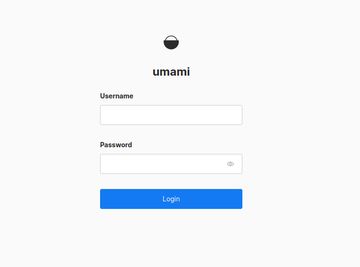
Finally, head over to your umami instance. You can sign in using the default credentials: admin for the username and umami for the password.

After that, simply follow the steps outlined in the official documentation to add a new website and add a script to your website.
Voila! You’re all set!
Here’s a handy tip from me: If you prefer not to be tracked by umami, you can simply add local storage in your browser: umami.disabled = 1.
And here’s another great thing: Whenever there are updates from umami, you can easily sync them by clicking Sync on your forked repository. Then, Vercel will automatically build the updated version for you.
Summary
Simple and easy.
Umami is privacy-focused, with a really clean and user-friendly interface, it’s great for small to medium websites with simple needs.
Unlike the cloud plan, with this self-hosted solution, you can add as many websites as you want. Enjoy!